Enjoying the last days of summer & my roasted tomato Gazpacho

IMG_1048

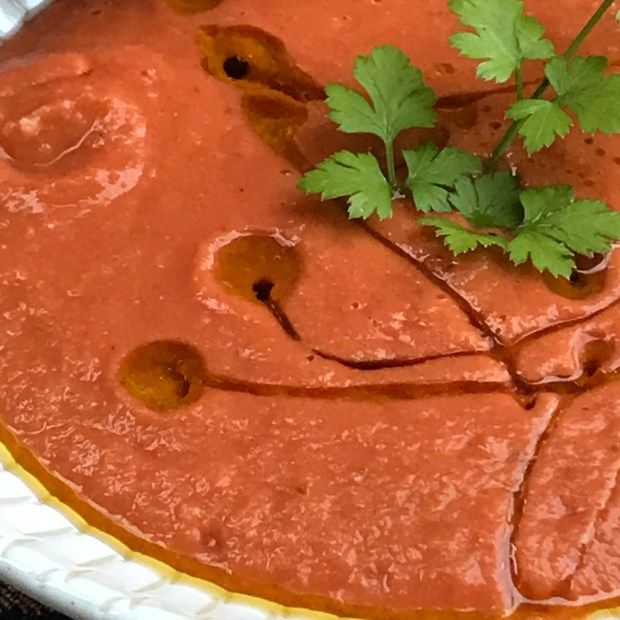
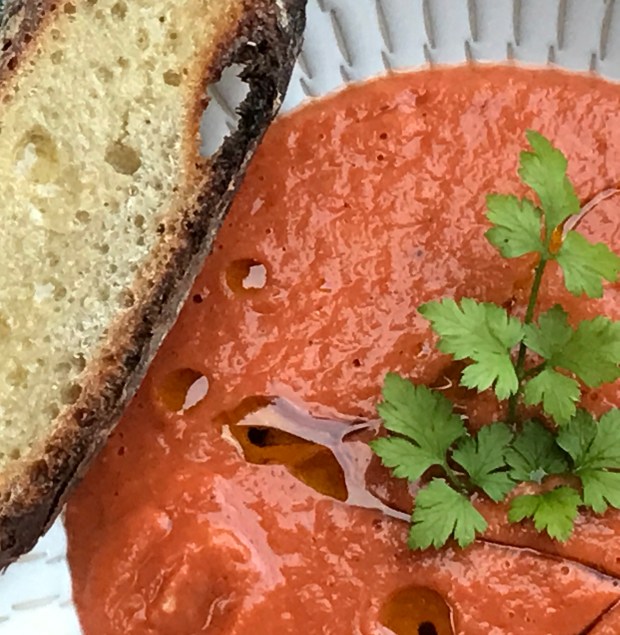
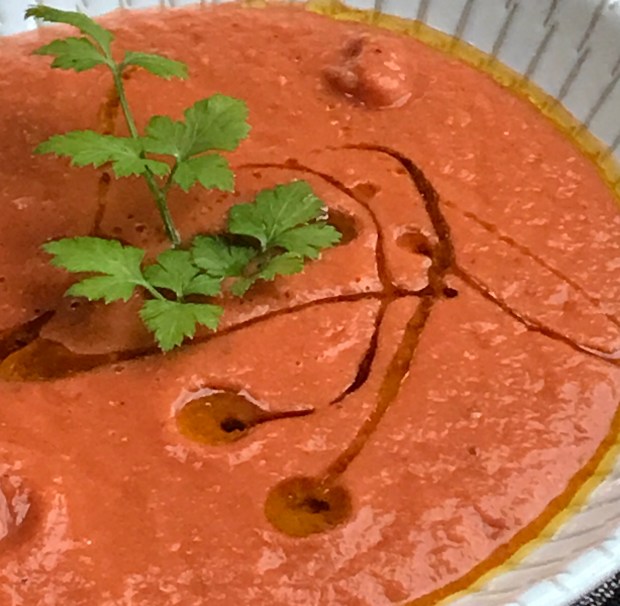
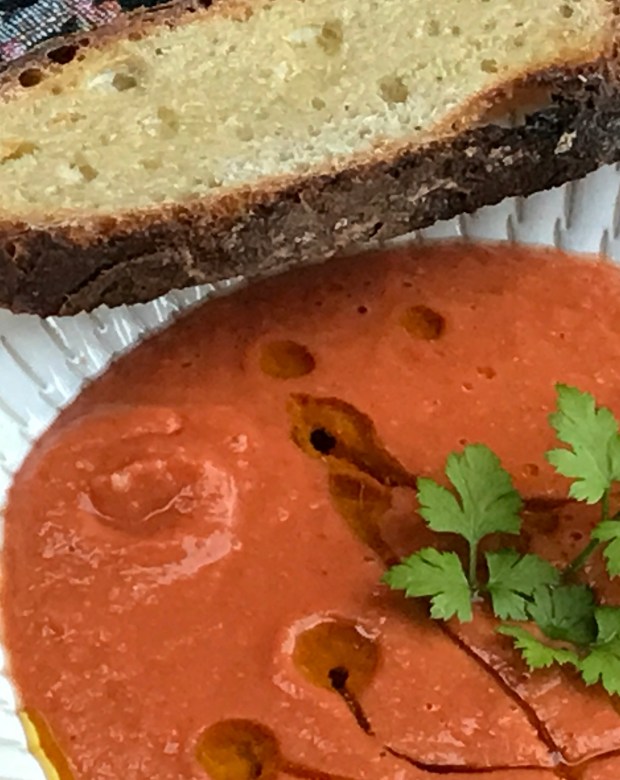
The nights have got quite cool, but we’ve a had a few warm days, so a barbecue called for roasting vegetables while grilling my supper in preparation for what could be possibly be the only Gazpacho I will make this season. Gazpacho is what you make when tomatoes are in full season and the days are still hot and you really don’t want to spend time in the kitchen making it any hotter than it already is. I can’t say we had one of those famous heat waves this summer… Oh well, I still want my gaspacho! I like to roast the tomatoes and peppers (in a dish) on the top shelf of my barbecue, closing the lid when I’m done, leaving the tomatoes inside and allowing the smokiness to really sink into their flesh. You don’t have to make the gaspacho that same day, the tomatoes and peppers will keep for a couple of days and you want to soak the bread in all that glorious cook juice, so if you have some tomatoes handy and you’re firing up the barbecue, place them in a dish (that can withstand the flames) and roast them while you grill your meal. You can also easily make this gaspacho without roasting the tomatoes, I just like the smokiness you get when roasting your tomatoes. So, go out there and enjoy the last of the summer!

Recipe

3-4 medium size tomatoes, roasted

1 red pepper, roasted

1 cucumber, seeds removed and cubed

1-2 garlic cloves

1 large slice of country bread, crust removed and cubed

1 teaspoon smoked paprika

1/4 cup fruity olive oil

1/4 cup sherry vinegar

Salt & pepper to taste

Instructions

Soak bread in bottom of bowl topped with roasted tomatoes and pepper overnight (you can also soak bread in water for 10-15 minutes, drain without squeezing) place in bowl of food processor. Peel and remove stem and seeds from pepper and add with remaining ingredients in the bowl with bread. Process until smooth, taste and adjust seasoning if necessary. Garnish with a drizzle of olive oil and parsley, serve with a slice of fried country bread. Makes 2-3 portions, keeps in the fridge for 1 week and can be frozen up to a month. Enjoy!

IMG_1044IMG_1049IMG_1046


Advertisement

Eggplant ragù with creamy polenta, chasing rainbows, beautiful sunsets and Bittersweet moments

SCN_0001The end of summer is usually a time in the season that I love. Fresh fruits and veggies abound, evenings get cooler. Cozy evenings call for warm and comforting dishes and a better nights sleep for being more comfortable! This year, because of our weird summer, it feels like I’ve been cheated out of this. I’m enjoying the cool evenings and the market, but I’m not quite prepared to let go of the summer. Where were the heat waves, most of all, who stole our sun??? Cross my fingers that autumn isn’t dismal and grey… On a more positive note, after a big rainfall last week, a beautiful rainbow appeared. I always wonder if there is a pot of gold at the end of it…! 🙂 We’ve also had some beautiful sunsets recently, take a look!

I’m slowly edging towards filling and comforting foods. Eggplant can be so boring, and totally spectacular. It all depends on how you cook it, olive oil and garlic LOVE eggplant. A very simple and delicious side is to sauté some garlic in olive oil then add cubed eggplant. Allow the eggplant to caramelize , stir, continue until golden brown. Delicious! This ragù is a version of that, with eggplant and tomatoes to finish it off. It’s beautiful with polenta but would also do nicely with some fresh Pappardelle topped with flaked Parmesan and a light drizzle of olive oil. Happy cooking! 🙂

RECIPE

1 medium size Fond May eggplant (or small eggplant), cubed

1 custard marrow, quartered and sliced

1 shallot, thinly sliced

3 Roma tomatoes, cubed

2 large cloves garlic, crushed and sliced

1 sprig fresh oregano, thyme and basil, shredded, keeping top of basil for garnish

1/2 cup polenta

2 cups broth

Parmesan

Salt & pepper to taste

IMG_1004IMG_1007IMG_1011

INSTRUCTIONS

Bring broth to a boil, add polenta, whisking constantly. Continue to stir regularly, meanwhile heat a skillet on medium heat. Add oil to coat, add garlic and shallot, stir occasionally until golden. Add marrow, eggplant and herbs, stir to blend. Allow to caramelize, stirring only to distribute colour evenly, When well browned add tomatoes and stir to coat. Allow to reduce lightly, remove from heat. Verify polenta is cooked, then plate, coating polenta with ragù. Lightly drizzle with olive oil and garnish with basil. Makes 2 portions. Both polenta and ragù can be frozen separately. Enjoy!


IMG_1026IMG_1025IMG_1024


Sunday Paella


IMG_0860[1]

As a child, I grew up with my grandparents preparing paella at the cottage every Sunday in the summer. The dish is a fond memory of both the season but also my grandparents and the cottage. Later on, as I spent some time in Valencia, it was also a confirmation of a celebratory dish, as for the Sunday during the village feria, a large group of friends shared this beautiful dish served on tables set in the streets specially for the occasion. There is usually a fair amount of wine involved as well, in the form of sangria, it is summer after all (!) and maybe that’s what helps create such a festive aura 🙂

At our house, there was also a regulatory argument between my grandmother and grandfather, surrounding the making of the fire, the cornerstone of any true paella. You can make it on the stove, but you’d be missing the whole point! So as I was saying, the fire, which has to be just right, the coals need to keep for a good 30 minutes, but not too hot, or you’ll burn the paella. Next important part of the dish is the ingredients. The dish came to be in Valencia, in the Albufera region, where rice is grown and was made by peasants, so all the ingredients are what they had on hand.  Rabbit, seafood from the ocean nearby and local produce.  There is no one recipe as you will make with whatever you have on hand.  The dish is actually named from the actual pan you cook everything in. It could be a vegetarian paella, seafood, with meat, there really are no limits to your imagination! As we have fresh peas right now, those went in. The one constant is the Bomba rice, tomatoes, garlic, paprika. While cooking, the aroma is spectacular and the finished result is spectacular. Bonus? No dishes, everyone eats directly from the paella! Just have a few small dishes to collect meat bones or seafood shells. Now if that doesn’t spell fun, I don’t know what does! 🙂

Recipe

1 large tomato, diced

1 small onion, diced

2 pieces chicken

10 large shrimp

1/3 cup Bomba rice

3 cloves garlic, crushed & minced

1 red pepper, sliced

1 cup peas

1/2 cup garlic shoots, sliced

2 cups stock (seafood, chicken, I used a combination of both)

I tablespoon olive oil

1 teaspoon smoked paprika

Pinch saffron

Salt to taste

Instructions

On a well lit charcoal fire, heat paella with a tablespoon of olive oil. Place chicken and cook until golden. Remove and put aside, add garlic and paprika to pan and toss, add onions, toss, add tomatoes and blend well. Add peppers and toss, then peas and garlic shoots, toss. Add rice and stir to combine and allow flavors to meld. Place chicken then add stock. Place shrimp in a circle around dish. Allow to cook for 30-40 minutes. When you think dish is ready, continue cooking for 5-10 minutes as this is when the rice will caramelize at the bottom. Remove from fire and allow to cool for 10 minutes. Serve with lemons to squeeze over rice. Serves 2. Enjoy!

IMG_0857[1]IMG_0854[1]IMG_0858[1]IMG_0863[1]IMG_0860[1]IMG_0861[1]

Sunday Spaghetti & Meatballs with fresh pasta

Nothing says sunday night like fresh pasta with meatball sauce! I don’t exactly make mine like an italian nona, but I certainly love it! It’s simple, quick and super satisfying 🙂  And something about meatballs reminds me of childhood, what kid doesn’t love spaghetti and meatballs? I have a vague memory of my cousin Dominic and I waiting for dinner and getting excited because we were having pasghetti…Lol, I can’t remember if it was he or I who couldn’t pronounce it 🙂  As far as the fresh pasta is concerned, I warn you, once you start, it will be hard to come back! Don’t be fooled, it looks complicated and time-consuming but it really isn’t, and you’ll love it every single time !

Recipes

Fresh pasta

1 cup semolina flour and more for dusting

1 egg

1/4 cup water

Dash of salt

Place flour in a mixing bowl and make a well in the middle, add water, salt and egg and mix well. Knead briefly until smooth and soft. The dough should be pliable. Cover and rest in the fridge for an hour or up to overnight. In the meantime make the pasta sauce.

Tomato sauce

2 cups canned tomatoes

1 cup chopped fennel bulb

1 onion, chopped

1 garlic clove, minced

1 teaspoon fennel seeds

Salt and pepper to taste

1 teaspoon olive oil

Heat olive oil in saucepan, add onions and stir until soft and translucent. Add garlic, then fennel seeds and stir. Add fennel bulb, stirring to combine and add tomatoes. Simmer on medium low heat for 30 minutes. Meanwhile, make meatballs.

Meatballs

75 g. each ground beef, pork and veal

1 onion

1 cup mushrooms

2 cloves garlic

1 teaspoon smoked paprika

Salt and pepper to taste

Place onion, garlic and mushrooms in a food processor and process until ground like the meat. Place in a mixing bowl with the meat and seasonings and blend well. Make meatballs the size of your preference, the larger they are, the longer they will have to cook. Transfer sauce into blender and blend on high until smooth. Return to saucepan and add meatballs. Cook for 30 minutes or more until you’ve reached the desired consistency.  Make the pasta: using a pasta machine, flatten the dough in increments until thin enough to pass through the spaghetti blade. Do this by passing it first through the first increment, folding the dough in two and passing it through again a few more times until the dough is smooth, dusting with flour as needed for the dough not to stick. Now pass it through into the second size and continue until you reach the fourth or fifth size. The dough should now have lengthened and thinned. Now pass the ribbon through the spaghetti blade. Bring water to a boil in a small saucepan, drop pasta into boiling water and loosen with a fork if needed. Cook for 2-3 minutes. Drain and plate with pasta sauce and meatballs. Shave parmesan ribbons on to the pasta and decorate with basil leaves.  Makes 2 portions. Enjoy!

Stick to your ribs chili and can’t stop eating them biscuits

It’s Super Bowl Sunday, so I was inspired to cook up some comfort fare, such as a delicious chili with biscuits to sop up all that juicy goodness. Each are absolutely delicious on their own ( I actually ate ALL the biscuits, I just couldn’t stop! ), but why deny yourself perfection?  The long simmer of the chili breaks down the chicken and ends up melting into the sauce. The biscuits are so flaky and delicious, they can be eaten alone, with jam & butter, anything really! I used a combination of whey leftover from making greek yogurt and yogourt instead of buttermilk and the result is fantastic! So let the chili simmer, crack open a beer and enjoy your Sunday!

Chicken chili

Ingredients

230 gr. chicken thighs, cubed

2/3 cup red lentils

1 medium onion, diced

1/2 of each orange, red & yellow peppers, diced

1 tomato, diced

1/2 cup corn kernels

1 1/2 cup tomato sauce

2 garlic cloves, minced

1 stick cinnamon

1 tablespoon mexican chili

1/2 teaspoon smoked paprika

1/2 teaspoon cumin

Salt and pepper to taste

Garnish with sour cream, grated cheese, diced avocado and cilantro

Instructions

Sauté chicken thighs until browned, add onions and continue cooking until soft and translucent. Add garlic, chili, cumin and paprika and sweat the spices for 1-2 minutes. Add peppers, tomatoes, tomato sauce, corn & cinnamon. Cover and simmer on low heat for 1 1/2 hours. Check that chicken has pulled apart, if not muddle with a wooden spoon until meat pulls appart. Continue simmering for a further hour uncovered. Add lentils and cook for 30 minutes more. Serves 2 with toppings and biscuits. Both can be frozen seperately for 3-4 months. Enjoy!

Biscuits

Ingredients

1 cup flour

4 tablespoons butter

45ml whey

45ml yogourt

1 teaspoon baking powder

1/4 teaspoon baking soda

1/4 teaspoon salt

Instructions

Preheat oven to 425 ° . Sift all the dry ingredients together. Cut in the butter until rough crumbles occur without overworking, add liquid and stir in using a wooden spoon. When you have a shaggy dough, lightly need with your hands 5 or 6 times. It’s important not to overwork the dough, keeping pockets of butter will make the dough flaky. Roll out the dough to 1″ thickness and cut using a floured cutter or glass. PLace on parchment paper lined baking sheet and bake for 15 minutes or until light golden brown. Let cool. Makes 6 medium or 8 small biscuits, biscuits can be frozen in an airtight container for 3-4 months.